Reviewed by Anurag Mishra (Sr. Technical Consultant)

Hey, ever wondered how your packaging or products hold up when they're stacked high, jostled around, or simply squeezed under the weight of the world-or at least other boxes? If you have ever held your breath while opening a box, hoping nothing inside was crushed, then you've already grasped the core of top load testing, it's about finding that threshold beyond which a product succumbs to pressure applied. Pressure quite literally.
But don't you worry, I'm not about to drown you in technical jargon or complicated standards. Let's have this broken down together, trust me, it's simple; just like having this chat over coffee.
First, it is necessary to explain what top load testing is. Just imagine a stack of PET bottles, plastic containers, or even boxes-one placed upon another during storage or shipment. The weight from above presses those on the bottom. That is exactly what a top load test would mimic in order to find the breaking point.
Or in other words, top load testing ensures your packaging-or products-isn't crushed like a soda can when the weight of the world starts piling on. And let's be honest-no one wants some crushed product showing up on their doorstep.

When it comes to testing, a few standards help to outline the process. Sometimes, these guidelines can seem like some sort of invisible rulebook that will guide you through what needs to be done so that your product doesn't fail under pressure.
ASTM D2659: This is one of those major standards referred to when the top load tests are being performed. The standard covers resistance to compression by rigid plastics, something too important when working with items like PET bottles. This ensures that your bottles can handle the load without caving in.
ISO 1217: While this standard normally deals with pneumatic testing, it plays a big role when testing for compressive strength, especially if pressure occurs.
That's the beauty of such standards: they take out the guesswork. Think of them as much like a recipe, to which you just follow it, put in all the right ingredients and voilà! you get one great result. You skip steps, well, just don't serve that cake to your guests. Same with top load testing. Stick to the standards, and you're golden.

Now that we are over the basics, let's head over to best practices. Going in blind won’t help, there's a proper method to this madness. Don’t worry, we’ll help you get the most out of your top load testing
1. Know Your Product's Limits
You would not test a balloon as you would test a steel box, would you? The material you are working with makes all the difference. Is it rigid? Flexible? Knowing the physical characteristics of your product will help you choose the right test parameters.
2. Simulate Real-World Conditions
Say you're testing a bottle. Now, think about where that bottle is going to go. Will it be on a truck? In a plane? Stacked in a warehouse? The testing has to be the most realistic, only then will it better simulate how a product is realistically going to hold up. Testing the product as if it’s the real deal is important, because at the end of the day, it is what matters.
3. Document Everything
Don't leave anything to chance, record your test results meticulously. It's not just for your own peace of mind; it will also trace patterns over time. If a particular batch of bottles seems to work better time and again, perhaps there is something unique about that production run.
4. Test Several Samples
Think of it this way: You would not want to base your judgment on an entire movie from one scene, right? Testing one sample isn't sufficient. You will want to test multiple samples from various batches so that you are really able to get a sense of how your products perform under pressure.
5. Improve Your Testing Equipment
I am not trying to tell you that you have to possess the most sophisticated equipment, but upgraded machinery does make a big difference. The more precise your testing equipment is, the more dependable it will also be, the more accurate your results are going to be.
A Quick Example: PET Bottles
Suppose you are testing PET bottles, you know, the ones used for water, soft drinks, and juices. You may say, "How strong does a bottle need to be? It is only holding liquid, after all." But here is the catch, these bottles are stacked in hundreds in a warehouse. And if the bottom row buckles, you've got a mess on your hands.
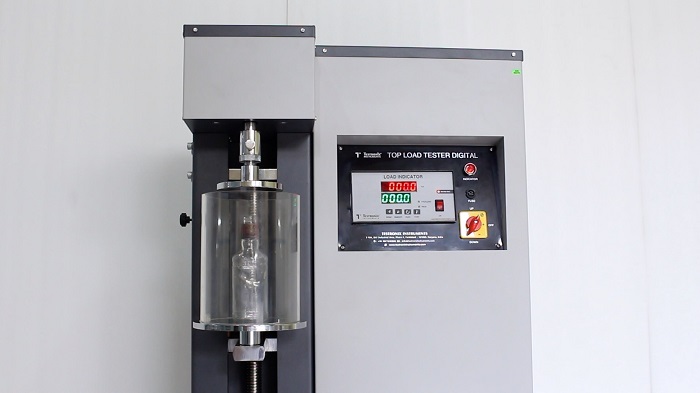
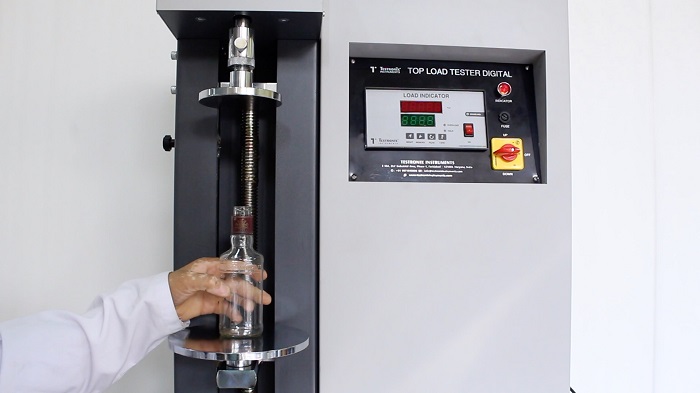
With top load testing, you simulate the weight of all those bottles stacked on top. You'll know just how much weight each bottle can handle before it crushes. This gives you a margin of safety, hence, no matter what, your bottles will hold up when the chips are down in real-world applications.
LET’S FEED YOUR CURIOSITY!
If possible, you should be testing samples from every batch or production run. The more often you test, the faster you'll find any potential issues before they become a huge headache.
Absolutely! While most normally applied to packaging, top load testing can apply to anything that sees pressure during stacking or storage.
Most top load tests are quick – usually just a few minutes in length. It's the setup and analysis that can take a bit longer, but the actual test is quite straightforward.